Multi Mode 70cm DIY Repeater Build Project Pt2

Well I finally had some time with COVID-19 raising its head again here in Australia to get back to the 70cm Repeater build as mentioned in Pt 1

Lets layout the hardware, before I get to my call for help.

The radios:

2 x Tait TM8235 just like the one I have hosting my UHF Winlink gateway

Taits.JPG

The modem:

1x Repeater Builders MMDVM v4 & Raspberry pi hat sitting on 1 x Raspberry Pi B3+

The duplexer:

flat pack UHF cavity from the 409 shop

Now to my problem

I can’t make it work!

Below I have collated the info from the Tait manuals as well as what I currently have as my setup.

Radio DB15 Pins

15 Ground

13 Audio Out

12 PTT

8 +13.8V Body switched

7 Audio input

6 RSSI indicator

MMDVM DB9 Pins

2 TX Audio

3 DVM Inhibit (active low)

4 RSSI

5 PTT

6 RX Audio

8 Ground

9 +13.8V

The actual problem: I have hooked it all up and on the pi-star home page - it NEVER receives any valid DMR signal. I have used the audio pot to turn down to make sure there is no clipping.

Tait Pin out.png
GPIO.PNG

New toy Lanchonlh HG-UV98 ARPS V/UHF HT

A chinese HT with APRS?

While scrolling around the internet recently I came across a Chinese branded UHF and VHF HT with built in APRS. The Lanchonlh HG-UV98 ARPS V/UHF.

I managed to snap one up for about AUD$200 delivered to my home. Its not as full featured as my Kenwood D72 HT but it is 1/2 the price, additionally it has BlueTooth access to the internal TNC (like the Kenwood D74) but it also charges by a micro USB!

2E925A69-90ED-43ED-99FA-B66B620FA0CA.jpeg

Like most HTs it included the near dummy load whip which went straight in the bin, and within seconds a SMA to BNC was added - I run BNC on every portable radio I own from the FT-857 to my DMR and FM HTs and my little APRS 1w tracker - when you have tired and cold hands BNC is a positive connection with gloves on rather than fiddling with the limited life SMA. I use the converters that seat within the HT recess on most of the HTs.

96E5C052-B7FB-4045-A5C3-EB29615D7CBC.jpeg

The manual that comes with the package is all in Chinese so that went into the bin too.
Here is the ‘english’ manual - and I mean that is the loosest sense. https://www.manualslib.com/download/1661386/Lanchonlh-Hg-Uv98.html

And there is a firmware upgrade available - so I added that straight away - the most noticeable change is on the GPS screen it shows the real Grid Square of the location
Firmware upgrade: https://hvdnnotebook.blogspot.com/2020/09/firmware-update-lanch-hg-uv98-aprs-radio.html

Now I mentioned BT - I was able to connect to my little android phone I have kept for portable radio operation using APRSdroid - worked PERFECTLY! using the same method I use with my Mobilinkd BT TNC. Essentially the same as setting up this HT: https://youtu.be/Mi-Hk2EwQVo

Well, I have had the HT for an hour - no doubt more to come!

AREDN in VK1 V1.1

AREDN in VK1 V1.1

I have been tinkering with the MESH IP networking system called Amateur Radio Emergency Data Network (AREDN) for a while now.

It’s essentially a private (on AR freq) ip networking mesh! As long as one mesh node can see another, it is part of the mesh.


The AR relevant frequencies are just beside the open wifi frequencies on 2.4 and 5.8Ghz so AREDN has written a custom firmware to turn professional and prosumer level networking equipment into a mesh capable radio.

Currently, I have a NanoStation M5 on 5.8Ghz, connected to a GL.iNET AR750 dual-band travel router on 2.4Ghz AREDN, interconnected using a Netgear managed 5 port switch. On the network, I am ‘serving’ or acting as the server for Team Talk 5 IP chat, video stream and PTT IP radio. All 12v powered - the switch is the only thing I need to figure out a POE feed step up from 12v to 48v.


Using VLANs on the switch I have also added internet connectivity to the mini-network. 

Now just need get more nodes online. There is the possibility to add ‘tunnels’, essentially VPN connections to create ‘logical’ connections to other nodes or full mesh networks where no RF path exist.


Read more about AREDN https://www.arednmesh.org/sites/default/files/sites/default/files/pictures/user12/AREDNmesh%20Brochure%20Final%202018.pdf

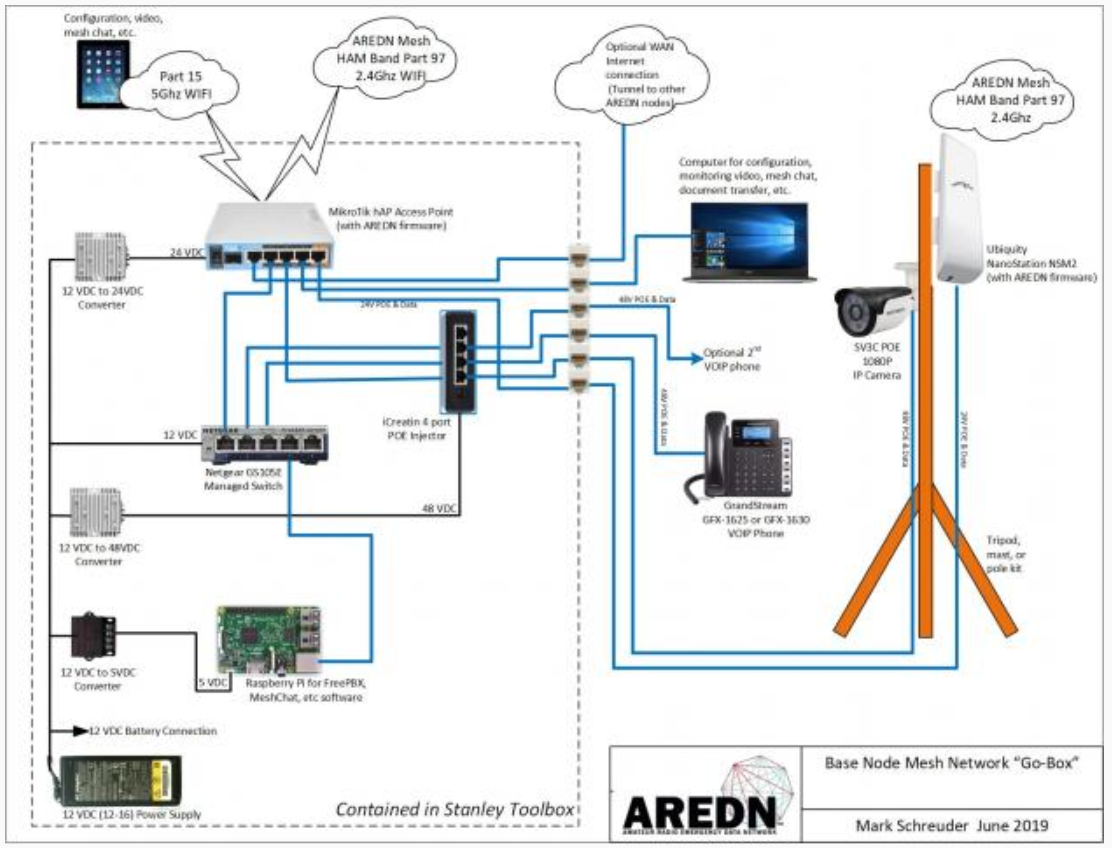
Below is a set up from Mark KE8LEN that I aspire to

Mark KE8LEN.PNG


APRS - my 2 options for Man Portable

I spend a lot of time when I am ‘playing radio’ in places that have little to no mobile phone service. This is both a blessing and a curse. It means that it likely means I am in an RF quiet environment from 3-30mhz on HF, however should I want to tell my non radio friends that I am running late but not to worry, or I want to check what repeaters are around me  - then I am out of luck.


There is a data mode called Automatic Packet Reporting System (APRS) - when it was created it was designed as a ‘intelligence gathering tool’. If you were plonked in another city with only your radio and a Terminal Node Controller (TNC), within 10min or so you could gather all you needed, from repeater information, local radio nets and know how to contact nearby stations in simplex as well as send 2 way short text messages. As time has gone on it has sadly fallen away to mostly be seen as a tracking device, showing where different stations are.

Just some of the fun things OTHER THAN TRACKING that I have found out is possible.


How do I use APRS when I am portable?

I always carry a small Android Tablet with me when I am operating portable for logging or using the raspberry pi for digital modes (http://wadeabout.com/blog/portablepi-a-raspberrypi-for-amateur-radio-portable-opers)  so since I am carrying the tablet it makes sense to use APRSDroid app. I connect a tiny match box sized Bluetooth TNC from http://www.mobilinkd.com/ - I have connection cables for all of my radios - my Yaesu FT60R (my primary HT), my back up HT a Baufeng UV5R, and a cable for my FT817ND which all allow connection to the Mobilinkd 2.

MobilinkdTNC1-Black.png

This allows me to send location data, receive repeater information, and send 2 way text messages.

IMG_20151122_114937.jpg

Recently I picked up a 1w APRS Radio with built in thermometer and GPS. Essentially is a fully self contained APRS unit.

1w APRS.jpg

 https://www.aliexpress.com/item/AP510-APRS-Tracker-VHF-with-GPS-Bluetooth-Thermometer-TF-Card-Support-APRSdroid-KISS-Model/32392912633.html it also has bluetooth inside so like the mobilinkd it can be used with the android tablet for 2 way communication, however in stand alone mode it beeps out location data based on your speed and recent movements so to not jam up the single APRS frequency.  I had read online that many spoke negatively about its meger 1 watt. I have not found an issue in residential Canberra. (VK1)

A look at a recent trip around the suburbs of Canberra. NB I am using an external Mag Mount antenna in the car.

A look at a recent trip around the suburbs of Canberra. NB I am using an external Mag Mount antenna in the car.

A zoomed out view of the stations that either digipeated or igated my 1w packets.

A zoomed out view of the stations that either digipeated or igated my 1w packets.

If you are still asking what is APRS? Here is a video by the guy who invented it: 

2021 EDIT: New radio - Chinese HT with APRS http://wadeabout.com/blog/new-toy-lanchonlh-hg-uv98-arps-vuhf-ht

Island Life - tech gear

MY LITTLE ISLAND HOME

Island Life - tech gear

This is the first in a series of posts called Island Life about the gear, techniques and tips I use to happily continue living on a small island, off Lombok in rural Indonesia.

Travelling long term, whether in one location or many presents a few challenges for the wanting to remain connected and sharing content.

Prior to heading off on this trip, I knew there would be a number of things I wanted to achieve that a tablet only setup would not be either best suited for or not convenient - such as video and photo editing. Possible, just not convenient. 

Computer
 

The Apple MacBook Air 11in with the TP-Link wifi adapter attached.

The Apple MacBook Air 11in with the TP-Link wifi adapter attached.

I resolved to retain my 2012 MacBook Air (MBA) as it had performed well since I purchased it, however, I more than tripled the onboard SSD to allow me to move my Photo Library on board, where previously I had managed it via external USB. 

Additionally, I added a higher sensitivity USB Wifi antenna, the TP- LINK TL-WN822N, mounting it using velcro dots onto the back of the MacBook Air Screen. This has been invaluable for 2 reasons:

  1. it does receive more wifi access points than the internal MBA wifi chip owing to its two folding antennas and
  2. it allows me to rebroadcast or retransmit the internet connection of the TPLINK via the internal wifi chip creating a hotspot for my phone to connect to an internet connection that the phone its self could not previously receive. I do this daily in my rented bungalow as I can not receive a wifi connection without the TPLINK adapter.

Photo & Video Quick View

Ursa loving our deep dive

Ursa loving our deep dive

Another challenge I needed to overcome is quick download and display of photos and videos. Often I am showing customers unedited pictures I just took of fish, turtles or them, on the dive we just came back on. Using the Lightning to SD card attachment on my iPhone 7plus has been a godsend. However In hindsight, I would have purchased a decent android tablet, with 4G and microSD / OTG capability for this very purpose along with quick sharing to customers emails etc.

Photo & Video Workflow

P8180008.JPG

After each dive I download all new photos shot on my Olympus TG 4 tough camera using the method I described above, however for videos that I shoot on my permanently rolling GOPRO 3 Black, I use my laptop to pull all the videos off and store for later editing and including in any youtube content I am making. When I return to my bungalow each night I download the day's photos that I now have on my iPhone7Plus to the laptop and do a backup using an external USB Drive.

The major downside of this workflow is the quick sharing without using a 4G or wifi connection is cumbersome. As Apple does not have an OTG capability yet, I can not simply put the day's pictures and videos onto a customers’ SD or USB Drive. I do however have a SANDISK iXpand 64Gb USB and Lightning Drive that makes moving larger files easier between iDevices and USB and then onto customers devices.

Cameras

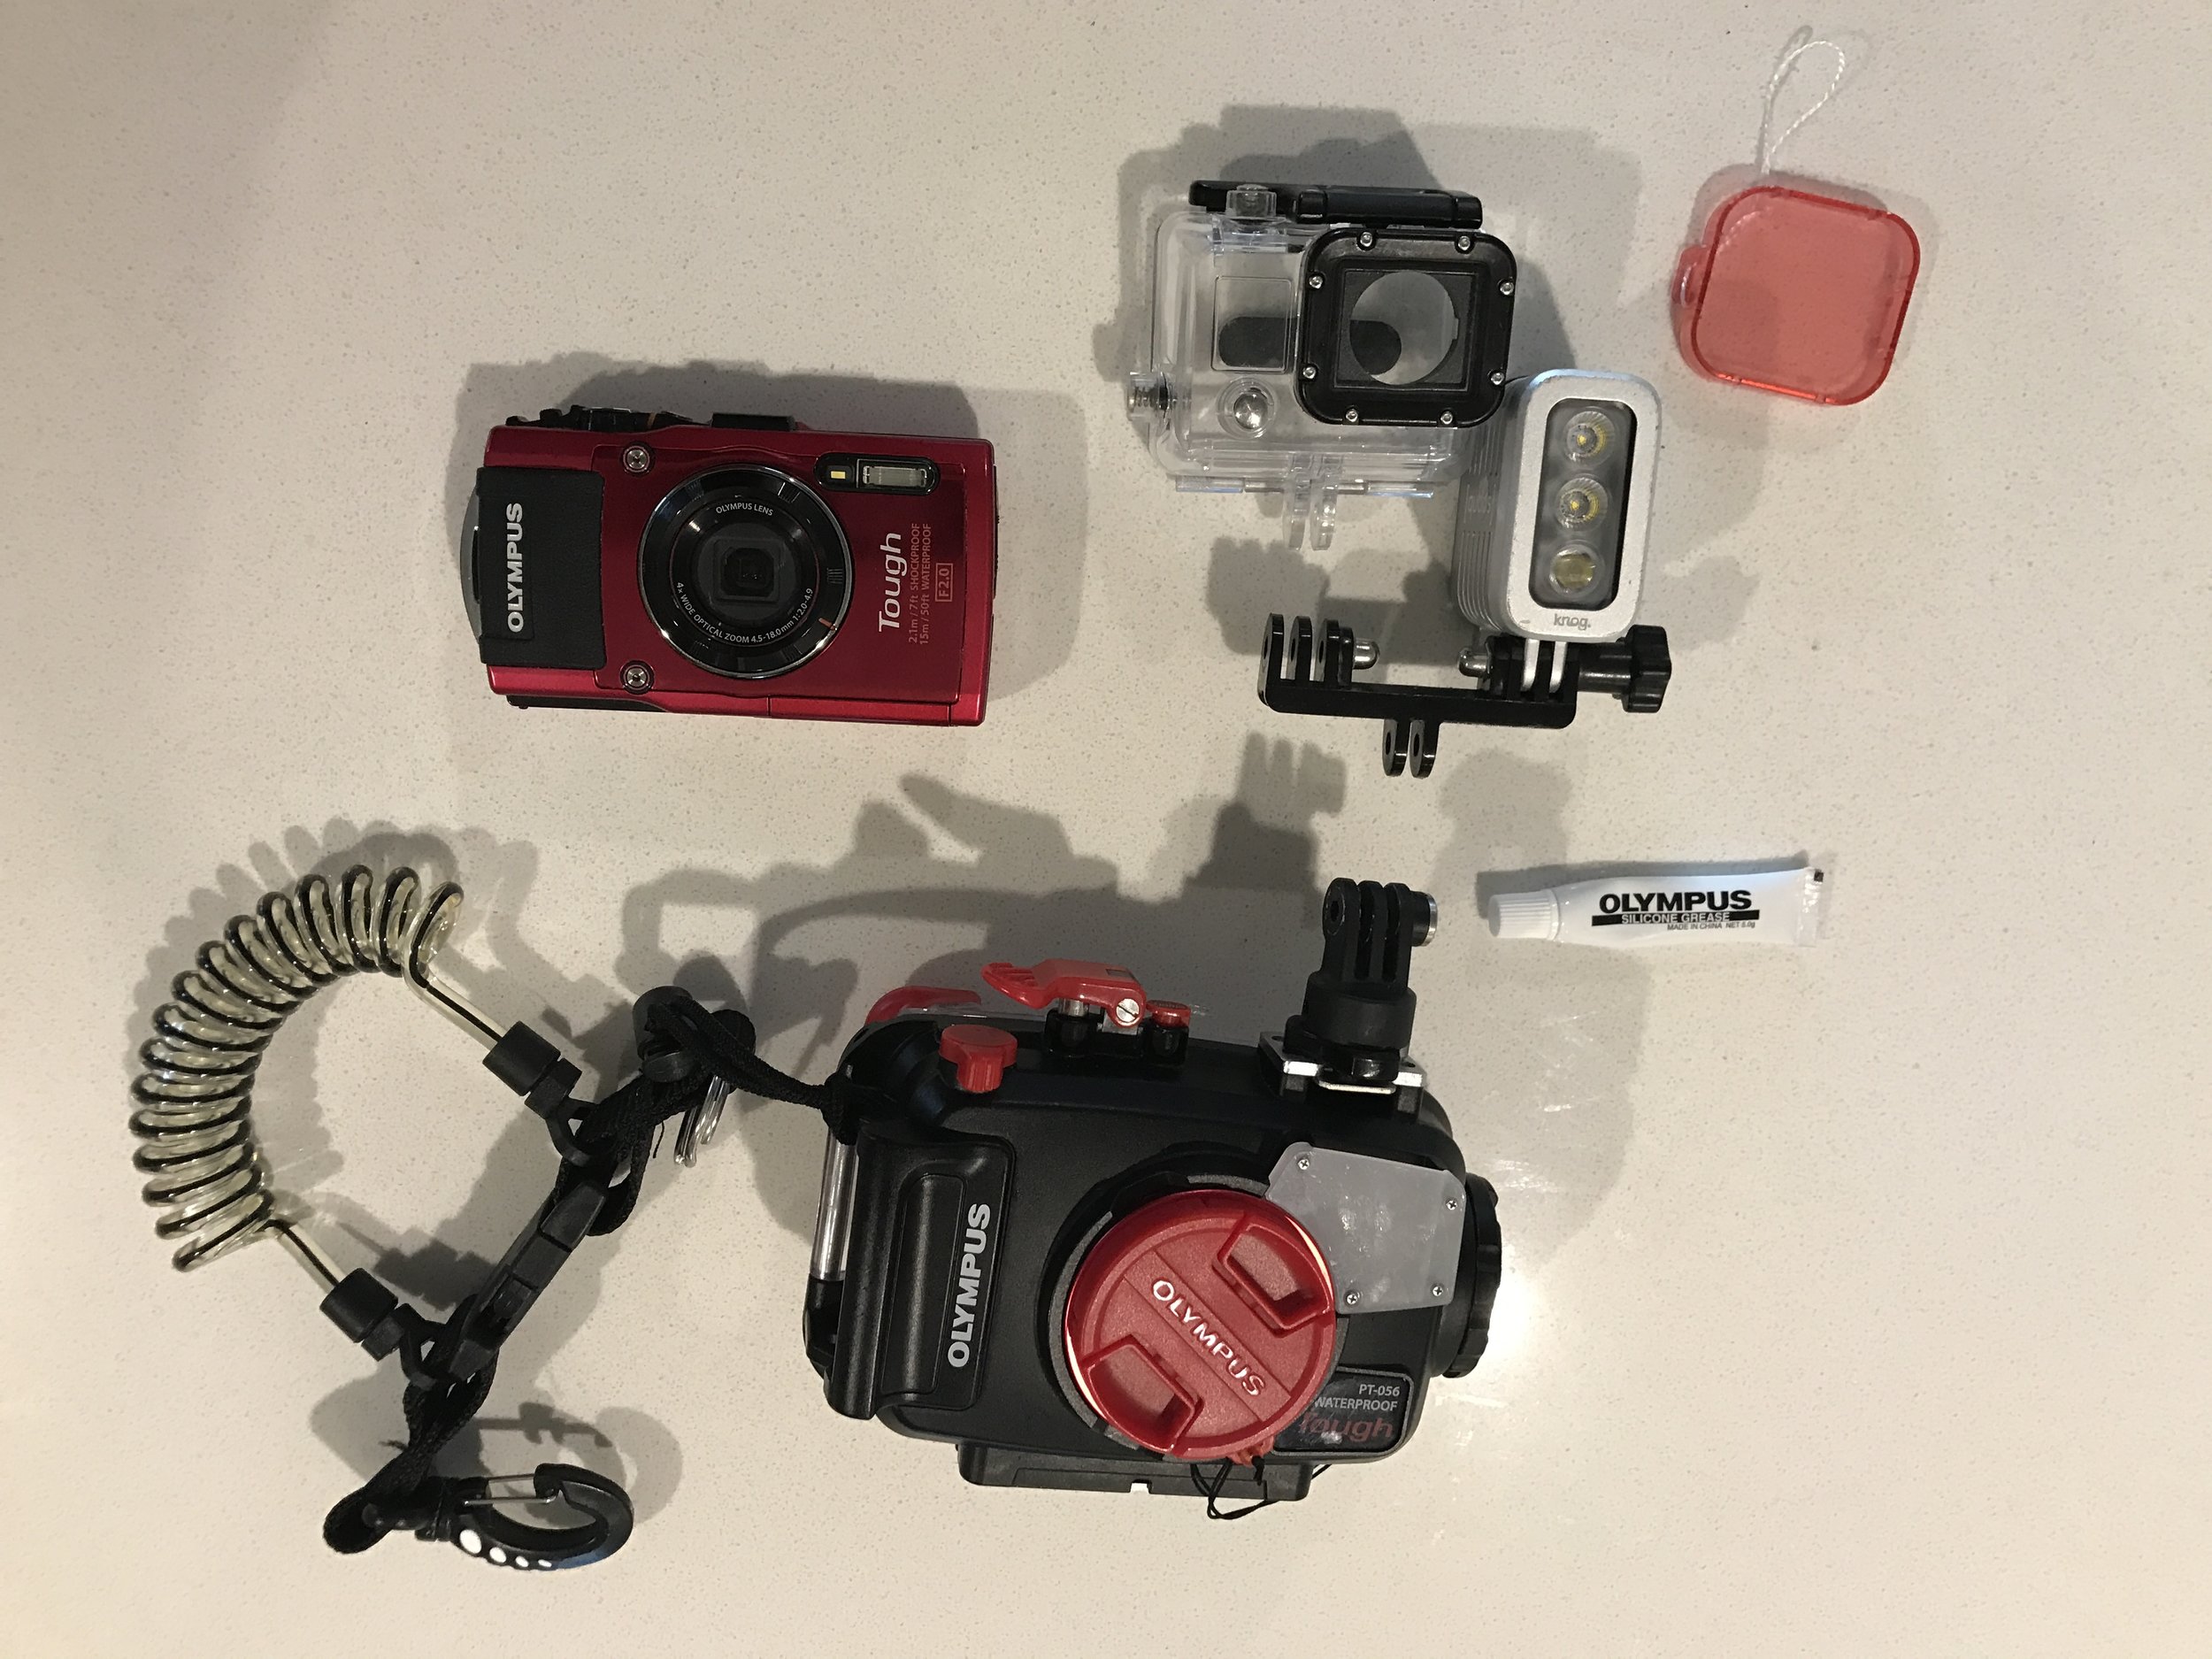
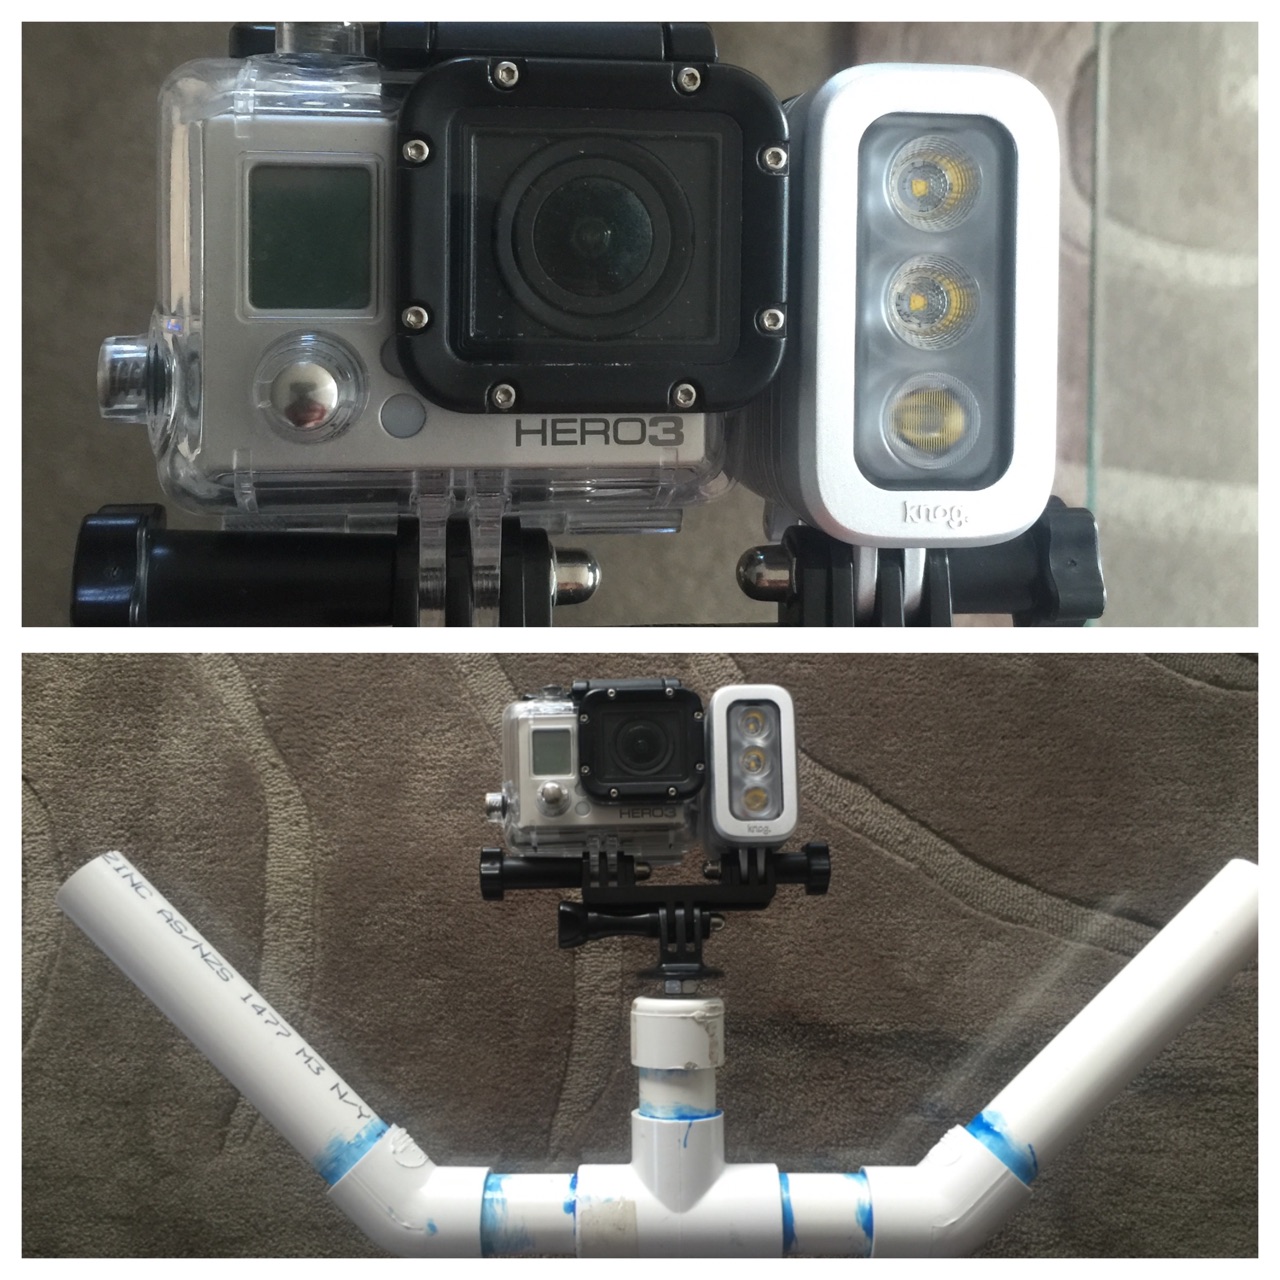
THE ENTIRE UNDERWATER CAMERA PACKAGED, OLYMPUS TG4 CAMERA, PT056 UNDERWATER CASE, GOPRO3 BLACK, KNOG LIGHT, RED FILTER

THE ENTIRE UNDERWATER CAMERA PACKAGED, OLYMPUS TG4 CAMERA, PT056 UNDERWATER CASE, GOPRO3 BLACK, KNOG LIGHT, RED FILTER


The heart and soul of my land based picture and video work are the great cameras of the iPhone7Plus. Whether hand held or on a selfie stick - it is never far from me and ready at moments notice to snap a great picture.

EDIT: I wanted to also give a highly honourble mention to LifeProof for their iPhone7plus case. It has taken multiple drops from my pocket while riding my bike, been splashed with fresh and salt water (I'm a diver, always near water) as well as generally added grip to the normally slick iPhone7plus.  I did have a lifeproof on my 6plus in the past and it was horrendous - the design flaws of the locking clasp for the charging door have thankfully been overcome  

However underwater, the two superstars are:

  1. Olympus TG4 Tough Camera - without the PT-056 underwater case it can happily go down to 15 meters, with the PT056 it will chug away down to 40m. Taking simultaneously 16mb JPEG and RAW images as well as 1080p video - I love this camera. I want to get a strobe for it eventually too.
  2. GoPro 3 Black  - with a side mounted Znog Sports light in the ‘cold shoe’ mount on top of the PT056. The GoPro generally is running from the entry until the battery dies (only 45 min.. this is terrible for me). I also use a red filter to compensate for the loss of the colour red at depth. Recently the hard GoPro Case has started leaking slightly during dives. Without the use of toilet paper in the bottom of the case I don't know if it will be remaining in the underwater set up for much longer.

PROTIP: Do not use devices with hard to source or proprietary cables. If they break (and they will) they can be hard to get. My Olympus is one such device. I purchased two cables on ebay before I left - first broke week 4.


Battery banks

Living on an island where the power goes off a number of times a week, I like carrying a full USB battery at all times, whether it is to charge my iPad, my iPhone, my cameras or even my Bluetooth keyboard. Currently, I carry one and leave one on charge swapping on a daily basis. Alternating between a no name, 2 USB port 10,000mAh or a large 20,000mAh quick charge capable no name brand white brick. There is always one in my bag. Having the ability to charge everything and not slow down has been fantastic. I now only plug into mains power at night - mainly to charge the batteries.

Sharing &  staying connected  

While wifi is available in almost every eating or sleeping venue on the islands, wifi doesn't crack more than than about 3mbs shared across all the other users in each hotel. This lead me to investigate the large data packages available for 4G that is accessible on the islands. I stumbled across a 48gig package (Aug2017) by XL for 270,000rp for 30 days. This has been my lifeblood connection - uploading daily for instagram, emails and normal web browsing. I often tether my laptop to my phone as the 4G is more stable than the wifi.  

Review: HearFuse 'True Wireless Earbuds' bluetooth wire-free headphone

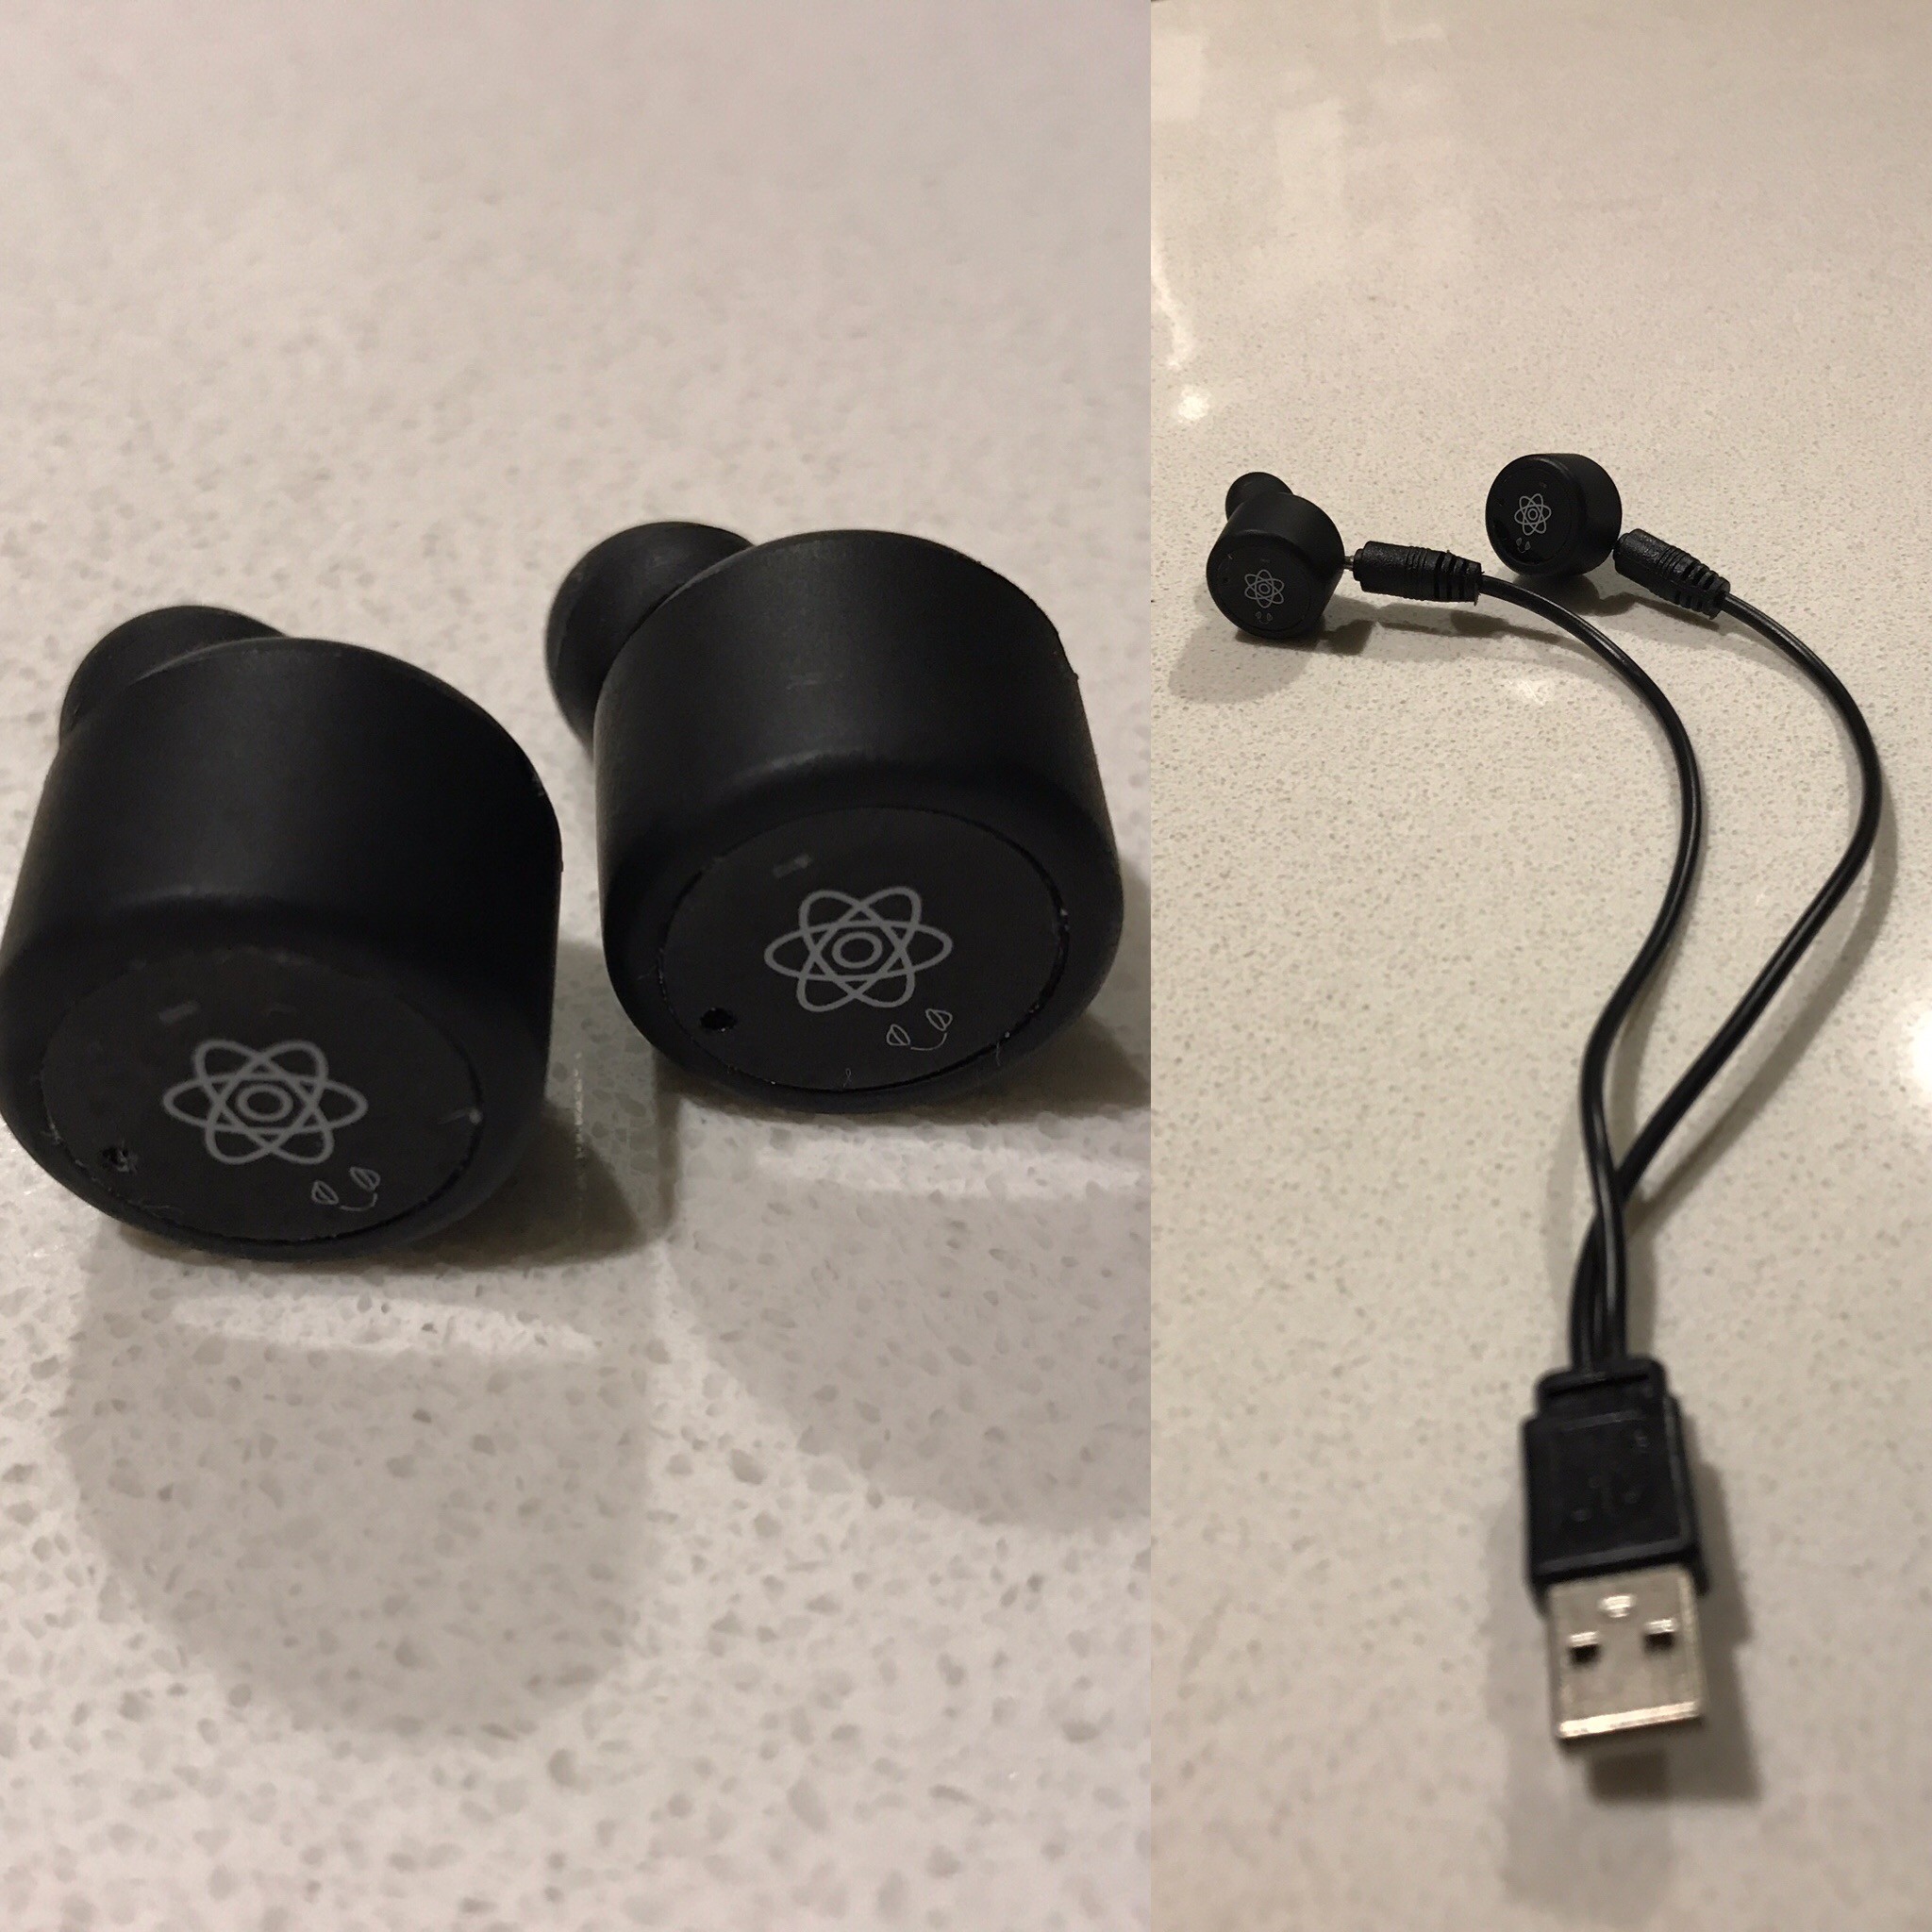
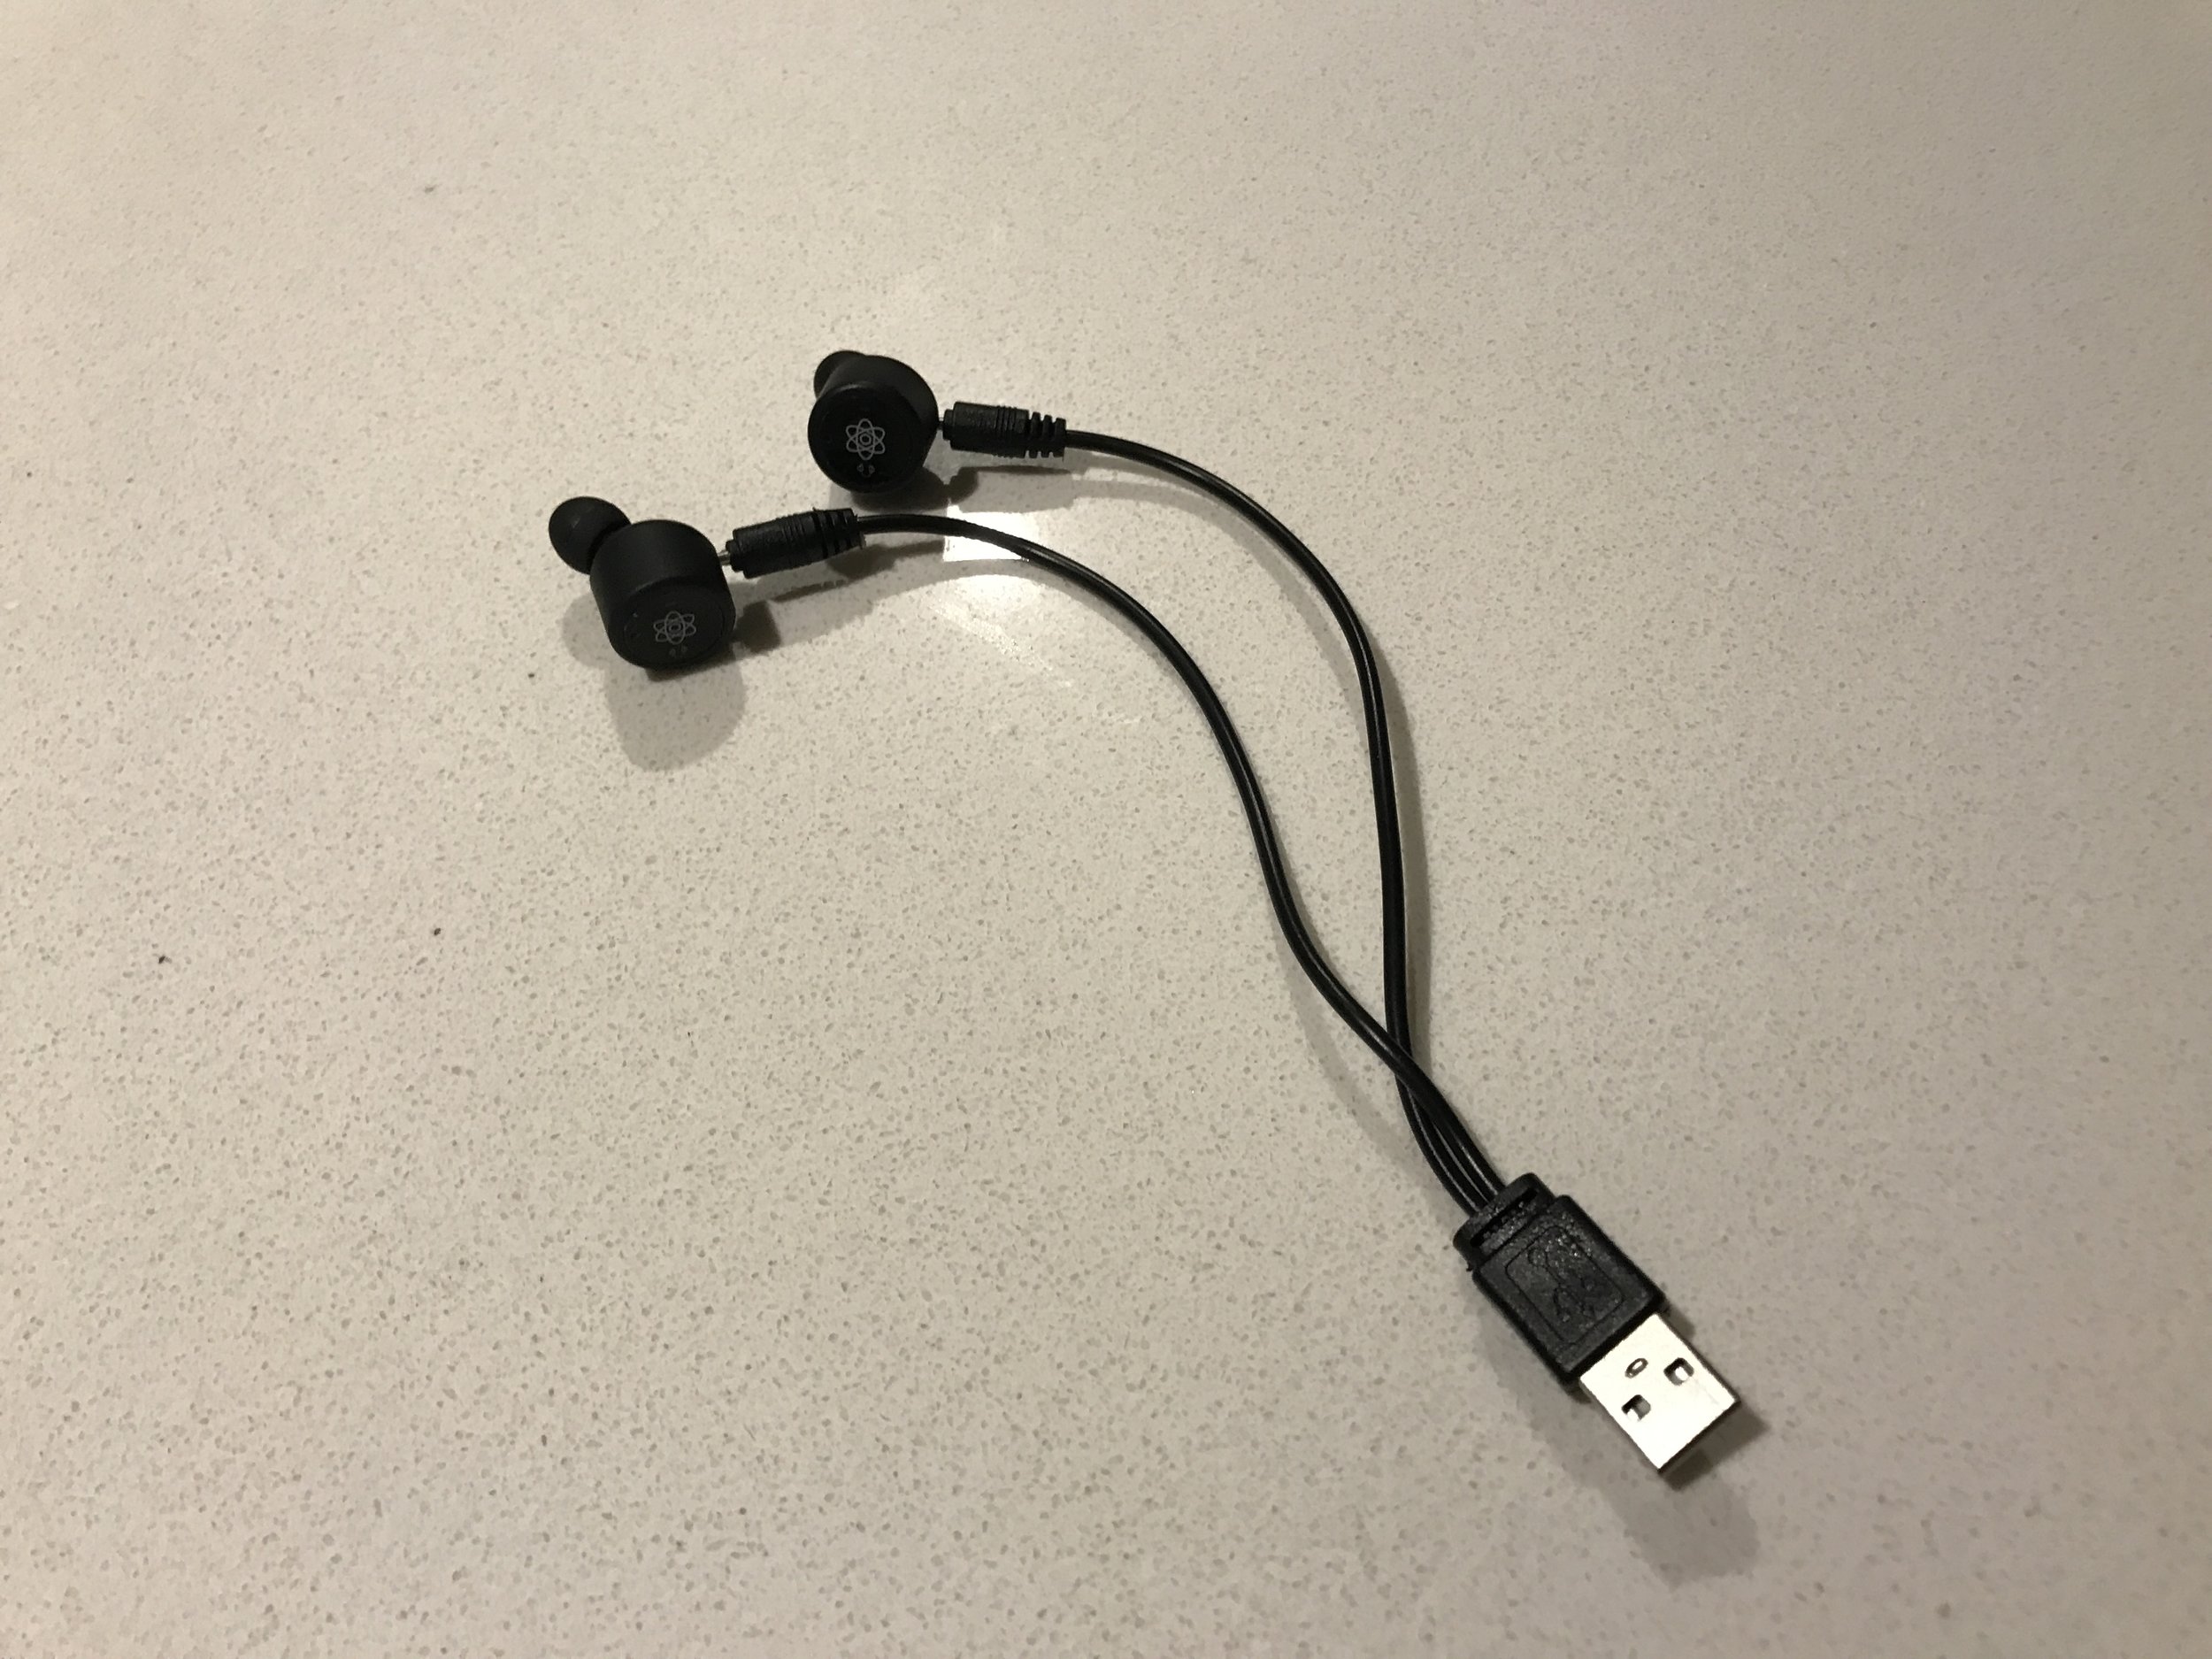
In ear pods with 2 headed charging cable

In ear pods with 2 headed charging cable

Overview

I saw an online ad for the Hear Fuse Bluetooth in ear wire free headphones (that's a mouthful. I'll call them hear fuse from now on) and liked the small look of them. I have been on an almost perennial search for a small pair of Bluetooth headphones I can fall asleep wearing and not wake up looking like some S&M participant all tangled up. While doing some googling into the Hear Fuses I found a distinct lack of original information rather than just regurgitating the company's website. I want to add to remedying this issue.

IMG_0335.JPG

After the Hear Fuses arrived I was a little dismayed to see they use a 2 headed proprietary pin charging cable for USB charging and they are slightly larger than I expected.

You pair each ear piece separately and they magically sync up to give stereo listening, at least that's the theory. I am achieving 60-80% success with dual connection and have required the delinking and relinking by Bluetooth at least 4 times so far this weekend.

IMG_0332.JPG


The Good

  • I like that I can just use one if I want, such as laying down or while driving.
  • They seem to have decent (multi-hour) battery life with their overall combined charge showing on my iPhones screen.

The Bad

  • The proprietary charger - ugh how annoying - seriously its 2016. I don't want another cable!
  • They are a bit bigger than I imagined.
  • The website - seriously minimum information provided.

3/5 *

  •  
  • EDIT: Feb 2017. I have been using the earphones for a while now. I realised that you just Bluetooth pair one headphone and then turn the other on. They talk to each other. Also - side note. The charger is the same as the Nokia small pin plugs.  I lost the "Y" cable after a few weeks. I purchased USB micro to Nokia pin converter plugs on eBay - haven't looked back.   Upgrade to 4/5.  
  •  
  • Looking for another Bluetooth wireless headphones?  Try these  

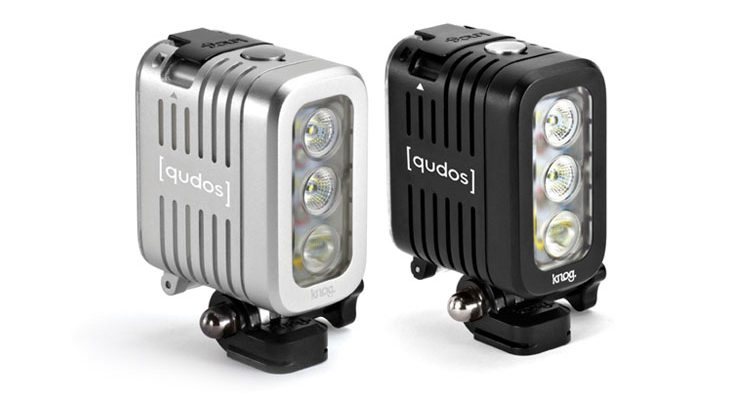
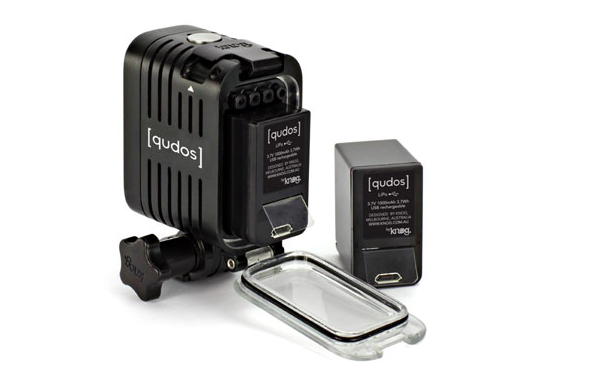
Gear Review: Knog Qudos GoPro Companion Action Light


No longer is the capture of your action adventures dependant on the sun being your only light source.

Encapsulated in a unit smaller than your GoPro, the Knog Qudos is the perfect companion to keep your action being recorded long after the sun goes down.  The added bonus of being waterproof to 40m makes it perfect for projects like my DIY Scuba GoPro Tray. The aluminium exterior acts like a large heat sink keeping everything cool and happy.

The Qudos has multiple modes to adjust brightness and light speed, allowing you to control your shots in any scene or location – whether deep underwater, high in the sky, or anywhere in between.

  • Output : 70 - 400 lumens
  • Dimensions : 31 x 70 x 40mm.
  • Weight : 150g
  • Materials : Die Cast + CNC Machined Aluminium heat sink and optical grade lens.
  • Battery : USB Rechargeable Lithium Polymer
  • Burn Time : Up to 4 hours.
  • Waterproof : The [qudos] action is IP68 tested and waterproof up to 40m.
  • Compatibility : For use with GoPro Hero 2, 3, 3+, 4 and action cameras with a GoPro conversion mounts.


Introducing our new project - a 1998 VW Transporter T4 - I guess we are joining #VANLIFE

A while ago I wrote about #projectsailboat. This was a desire to learn more about the “systems” of a boat prior to purchase. Such as a means of producing power (solar), storage options in limited space etc. Greater discussions with my partner led us to move away from the idea of a boat - we simply would not get the use of it, being some 150km from the ocean. The next option was a camper - we enjoy camping and exploring but due to weather this limits our options. A camper would extend the 'season' as well as offer a support vehicle for scuba diving. After much searching we settled on a relatively old 1998 VW camper van. It had been roughly converted - allowing us to add many of our own touches. The video below gives you a look at the van after we have had it for only 2 weeks.


Check out the video and don't forget to like, comment or subscribe.

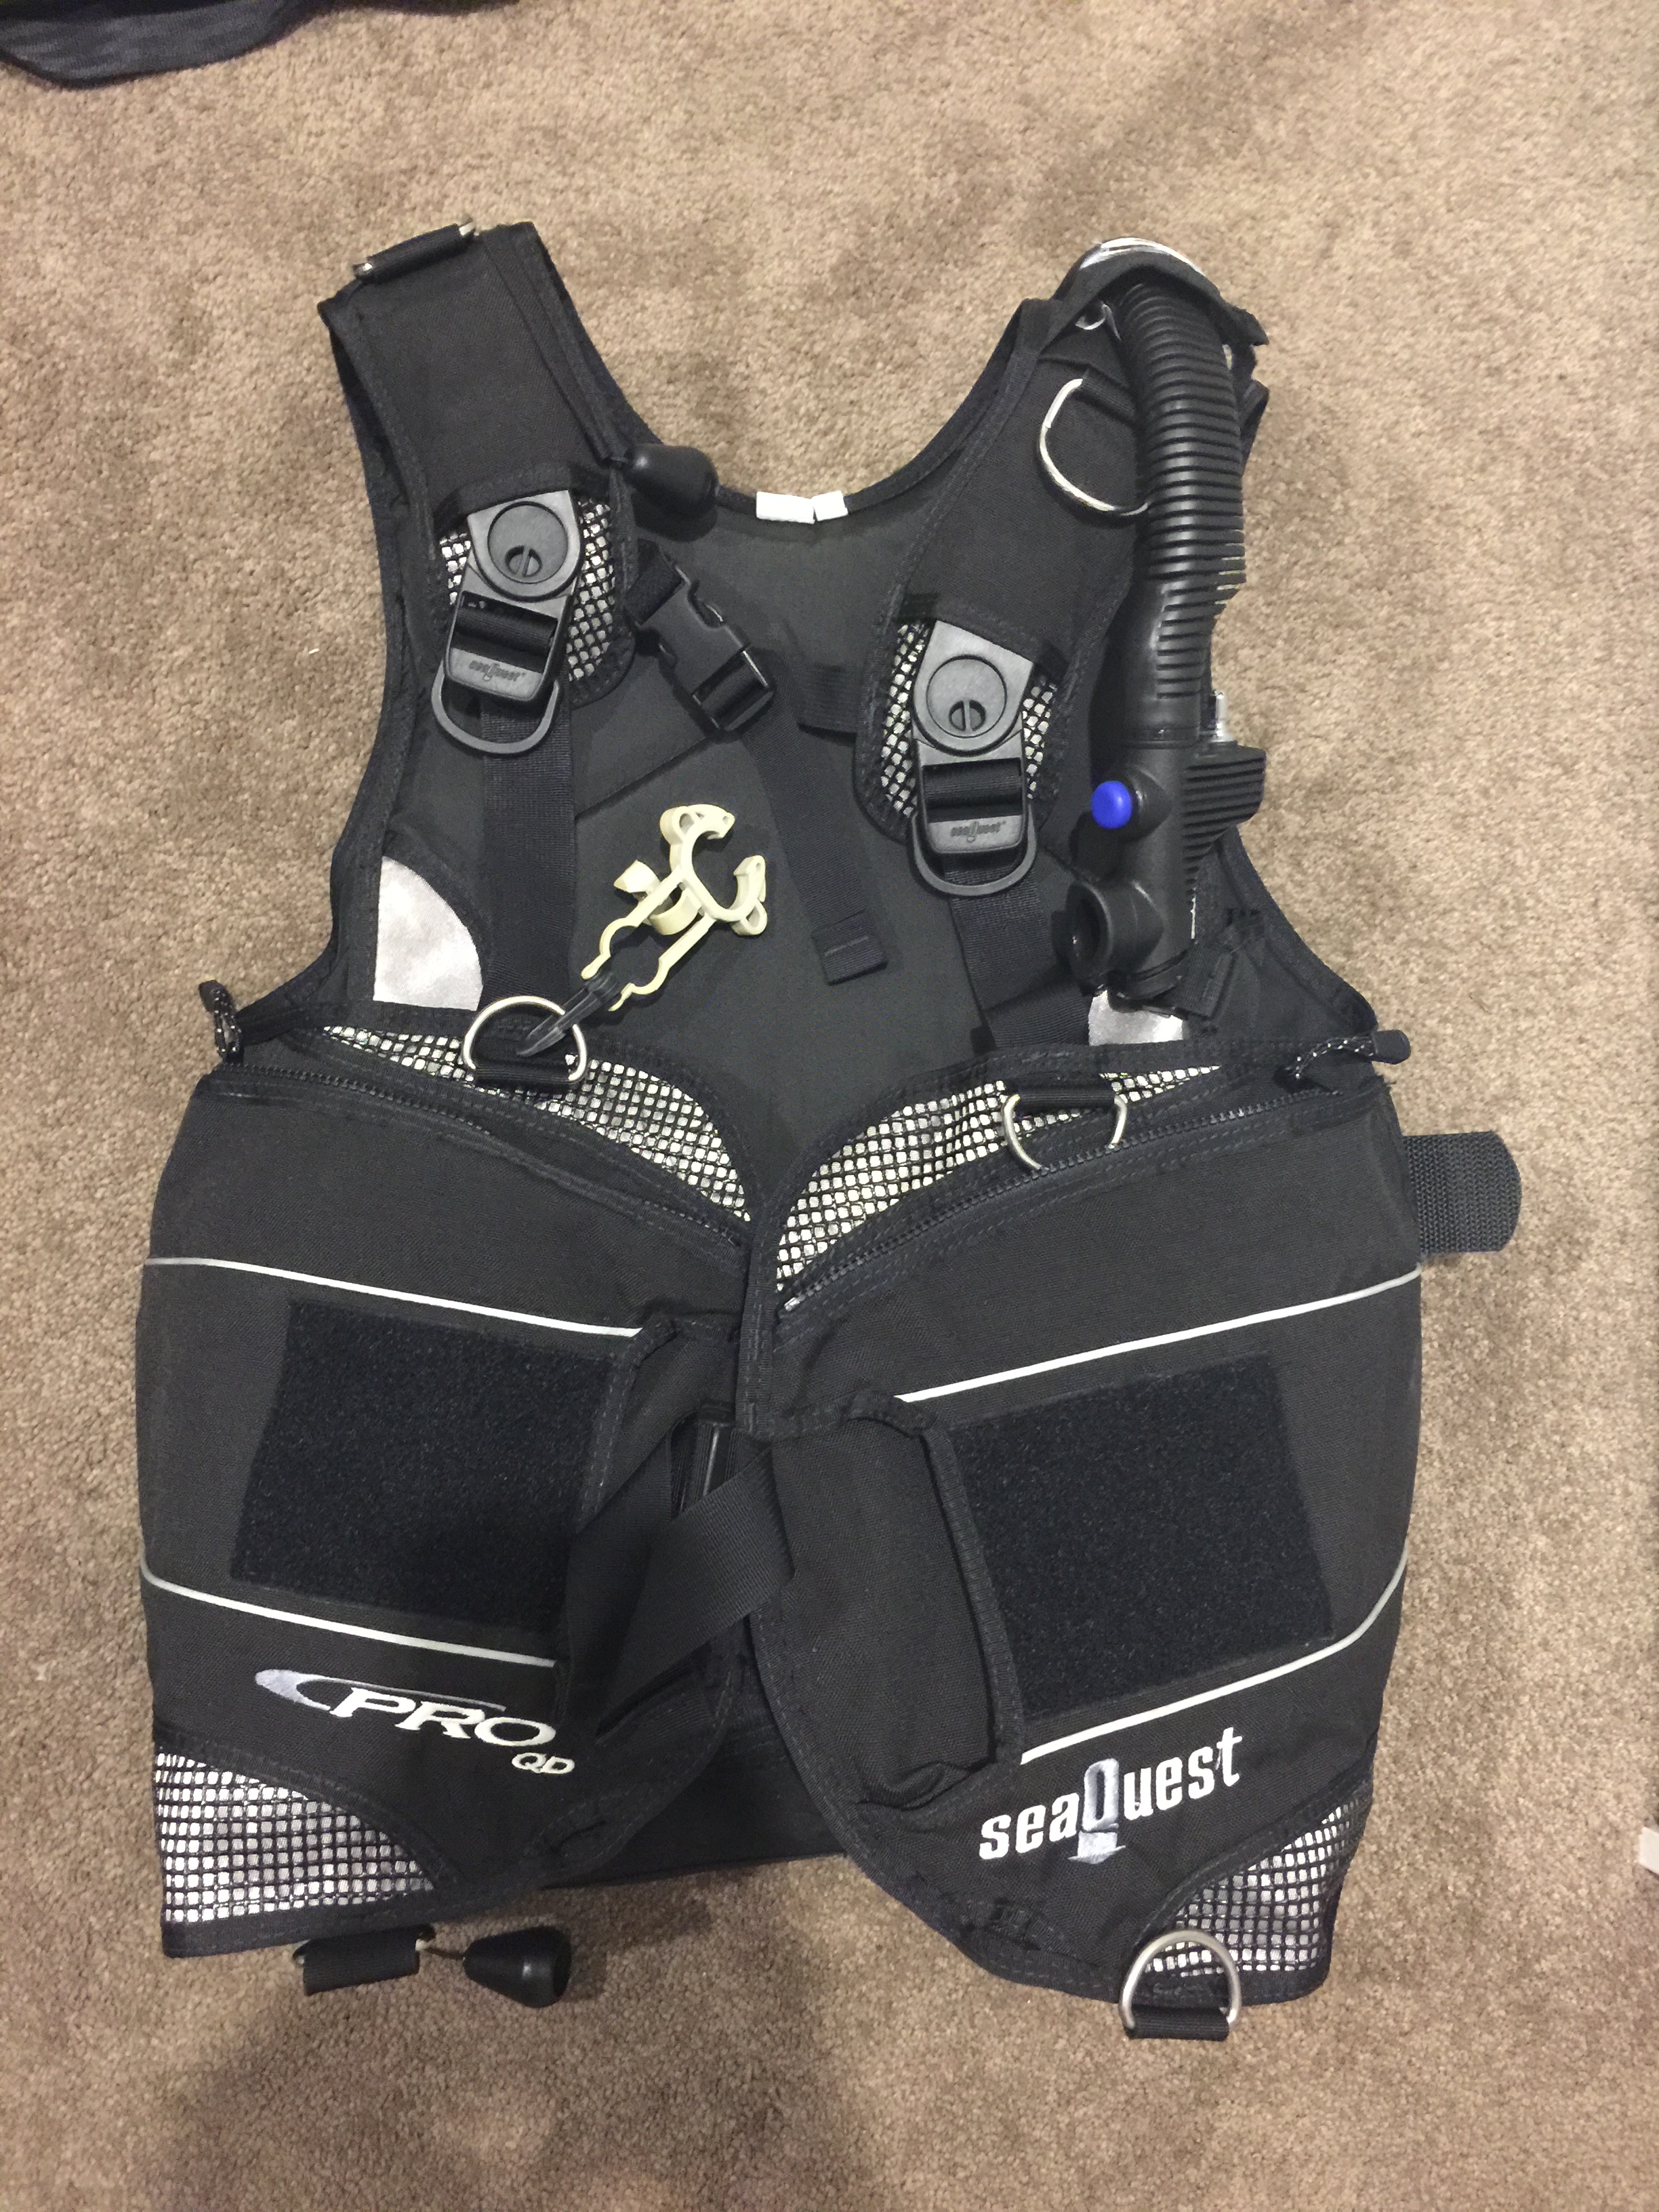
Gear: Scuba - Second Hand BCD Self inflating

IMG_5831.JPG.jpeg

I have just finished washing and putting my dive gear away following another day of double fun dives on the South Coast of NSW. For me this was dive 18 & 19.

Fresh from my tropical dives of Phi Phi Island in Thailand (and admittedly filled with false bravado), I kitted up just before the first dive as I have always done.

As with most of our club fun dives, today we were entering from the rocks so I added air to my Buoyancy Control Device (BCD) and entered the water with the rest of the group. After the usual awkward aqua-aerobics that is putting on your fins in a slightly surging wave group we pushed away from the rocks to the decent point. My BCD was making a funny sound and I thought “hmm maybe I have an air leak from an air hose”, I had my buddy check and she confirmed there was no visible air leak.

As we descended, my buddies started slowly sinking as they should but I could not go below one metre. I was weighted the same as other successful dives but was unsure why I could not drop down to the bottom at 7m. Luckily one of the Dive Masters (DMs) for the club dive was on hand and clipped an extra weight to me.

After getting down with my buddy we set off on exploring the underwater landscape - my video from Australia Day 2015 is shot at the same spot


I noticed my buoyancy was not very stable - all in one direction - UP. It was at that point I realised what the funny sound was on the surface - the safety valve on my BCD letting air out as it had over inflated. I know I only put a squirt or two in prior to entry and now the BDC was continuing to self inflate while diving - slowly but still inflating. to top this off my DIY Dive Tray was beginning to loosen and the camera and light set up was wobbling. I could not let go of it for fear of losing both GoPro and my brand new Knog Qudos Dive light. Review coming soon.


This dive was rapidly turning into a cluster. I was not in any immediate danger due to the relatively shallow depths - however I did need to continuously dump air from my slowly inflating BCD.

At the 35 minute mark I pulled the pin. I was not enjoying myself, so knew it was time to end the dive. I indicated my intentions to my buddy and the DM and up I went - metres from the accent point - perfect.

I still managed to record a great clip of a sleepy Port Jackson Shark snoozing on the sandy bottom.


The second dive was much easier as the issue was known, after the dives I discussed the issue with the DMs and they indicated that one solution would have been to disconnect the low pressure inflator hose and manually inflate the BCD with my mouth - all stuff every PADI diver is trained to do - I didn’t know I could disconnect it underwater - I know now for next time!

I will however be taking my BCD in for a service soon to fix the problem.


PROTIP: Why having mobile data can ruin a holiday

No coverage 1
No coverage 1

I know it is an agreement that most people would assume is 180degrees from my normal position, but here it is - Having a mobile internet connection definitely negatively impacted on our holiday.

This trip was very different to the 2013. During our time in Myanmar in 2013, there was 1 mobile provider with expensive access (a sim card alone cost $100 AUD). However this time, there were at least 3 providers with relatively cheap - including sim and 5gb for approx $30 AUD.

How did it negatively impact the trip? I hear you ask. It was not until we were in Myanmar, after having travelled to Langkawi, Kuala Lumpur and Genting Highlands in Malaysia that I realised I was spending a lot of time looking down (at my phone) and not up and out.

Maybe it is just me, but I suspect it is a wider concern for people around my age, especially in the west. We have almost instant access to anything we want online, usually via the screens of our mobiles. This post is not meant to be a mobile bashing piece, but I did want to highlight what I missed out on.

I know within myself that if I am going some where that has no connection at all, that is totally fine, I prepare. I lived in East Timor for 6 months in 2008 which when you said you had ‘good internet’ meant that you did not have to share the dialup connection with 4 others. Also mobile data was unheard of. I can cope with that - for a period at least. My issue is when there is a hint of connection, a fleeting blip of connection, I become obsessed with getting the news, Twitter and Facebook on that tiny connection.

This was the case during the 250km, 5 hour car ride from Yangon, Myanmar to the very west coast at Ngwe Saung Beach.

Looking back, it was an issue totally of my making. I was excited to test out one of Myanmar’s new carriers along with staying connected.

I missed out on bonding with my fellow travellers, along with seeing the countryside change as we moved from the lush Irrawaddy Delta into the dryer west coast. Seeing villages that have never had mains power connected, yet use 150w solar panels on top of their palm-fron roofs to power lighting and in some cases a 12v TV to watch football.

IMG_5030
IMG_5030

Tips for offline travelling

These are some if the things I have done in the past that have helped me enjoy travelling with while remaining offline

  • PODCASTS

If you haven’t already gotten into podcasts, you are missing out! Podcasts are downloadable audio clips. Usually radio segments or audio blogposts. For travelling I prefer things that won’t date. So I don’t listen so much to my nightly news podcast from home, rather I listen to a science or history podcast.

iOS has a podcast app built in, however I prefer DOWNCAST and have set it to only grab new episodes while connected to wifi.

Some suggested long form or serial type podcasts include

SERIAL

FINISHING LINE

STUFF YOU MISSED IN HISTORY CLASS

  • EXTERNAL POWER

We have all seen them, those zombie like creatures that are huddled around the one or two powerpoints in airports and bus stations. Don’t be one of them, seriously just don’t.

Fortunately I was travelling through Asia, with its huge electronics markets and picked myself up a 20,000mAh external battery, The size of a small shoe can be a downside, however I can steer clear of a powerpoint for days. A 5,000mAh would do most people, I am not most people :D. You can read more about my battery obsession here.

  • OFFLINE READING

I am always seeing videos, news articles or blog posts that I think “I would love to open that, but I just don’t have time at the moment to watch or read it now”

Well that was before Pocket came into my life. it downloads all the text from a post along with the embedded pictures for offline reading. I smash this every time I am flying or laying on a beach reading.

Coupled with free services like IFTTT you can even set up rules for social media such as “ Every time I fav a tweet with a link, I would like you to save it to pocket for reading later” which is a personal favourite of mine. As for videos, you still need to be online for those, however you will not lose them.

  • REMEMBER YOUR PHONE IS MORE THAN AN INTERNET PORTAL

There are so many undervalues apps and features that work fine offline and are a lifesaver for travellers. Whether it is offline google maps for Android, or HERE offline mapping in iOS, your camera with geotagging, watching movies that you have pre transferred.

With a little planning ahead there is no need for mobile data and no need for mobile data to eat into your holiday

If you like my content please also like my facebook page facebook.com/wadeabout

Help fund more content you can shout 1/3 of a beer each month at http://patreon.com/wadeasbout

W: wadeabout.com

T: wadeaboutblog

YT: wade85

IG: wadeabout

24 hours  with Lifeproof's new iPhone 6 plus waterproof case - the "Nuud"

IMG_4579-0.jpg

After many months of waiting finally LifeProof has released a limited number of their waterproof iPhone 6 plus case line.

I was lucky to snap one up and express shipped it from the US. It arrived today.

After a few hours use, I made a shocking discovery. LifeProof have made the charging port hideously small. My former iPhone 5’s LifeProof had a somewhat limited size hole but I found a number of cables that fit and made my entire EDC kit around that.

However the iPhone 6 plus LifeProof case will only accept cables “that are originally provided with the product” i.e. the original white cable. I rarely use these cables. They break to often and are too long for my every day needs.  I am now left with a plethora of lightning cables that are only usable for my iPad.

Hmm the hunt is not on for a 10cm narrow cable. Preferably before 27 March as we depart Australia.

UPDATE: on day 3 the two very tiny clips that keep the waterproof door closed over the charging port completely snapped off and were found on my bedroom floor. I super glued them back on, however I no longer have confidence on the waterproof nature of the door. I have requested a replacement from LifeProof.

Starting to feel like a real Scuba Diver

GOPR0404.jpg

I have now finished 6 dives following my PADI Open Water Diver Qualification. Of those 6, I have had to share air (essentially, I nearly ran out of air due to hyperventilation and excitement) if you would like to see this process, here is a Youtube clip showing the underwater process

I have now finished the final two, number 5 & 6. Only during these dives did I start to feel like a “real” scuba diver. Not just some one pretending. I was able to settle in to the dive. Enjoy it.

Here is a video of those dives (click on the picture)

“Diving

Gear update - Scuba Diving February 2015

Recently I was offered the opportunity to purchase some very good quality second hand Scuba Diving equipment. I managed to snap up a family new Buoyancy Control Device (BCD), first and second stage regulator (the hoses you breath through) along with a dive knife, a surface marker (an orange sausage that you inflate to get noticed on the surface) along with a really good quality mesh bag.

Some new kit include a Suunto Zoop Dive watch and a DIY GoPro Dive Tray that will hopefully stabilise some more of my dive videos

Here is a short video using all of the gear above along in addition to the standard here included in my “learning to dive” pack mentioned here

IMAGE ALT TEXT HERE

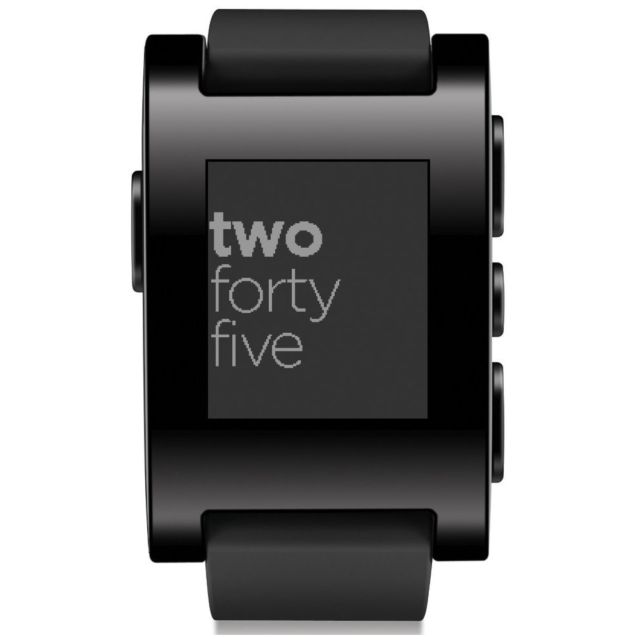
Pebble Watch - 18 months on

Pebble-.jpg

Pebble Way back in August 2013, I wrote about my first 72 hours with the now famous original smart watch - the Pebble Watch.

Read the original post here http://wp.me/p3SehX-4c.

It has now been 18 months and I am on to my second watch. The first was replaced under warranty due to a funky issue with the screen.

The Pebble has been a daily companion, no much so, I can not remember the last time my watch actually made a sound. I often get strange looks when I dash across a room at work saying my phone is ringing, I can feel it.

I have to say the only minor downsides so far for me is no automatic replies to simple SMS messages and battery life. I am getting roughly 6-8 days from my Pebble.

Since I purchased mine, Pebble have launched the Pebble Steel. A more ‘professional’ looking watch. I personally like my black plastic model.

A new colour Pebble seems to be in the works with images leaked ahead of a Pebble announcement

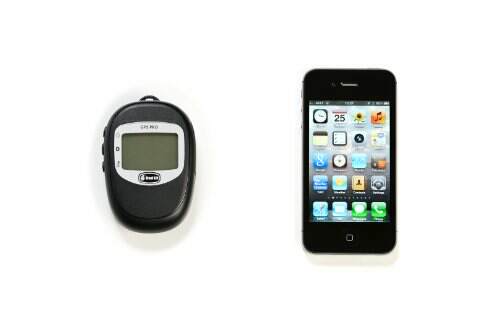
Gear: BadElf 2200 3 axis bluetooth GPS

Bad-Elf-2200-GPS-Pro-Blacksilver-4.jpg

Bad-Elf-2200-GPS-Pro-Blacksilver-4I recently picked up this tiny 3 axis Bluetooth tracker from eBay for $147.00 AUD.

There are two primary uses that I will be putting the BadElf 2200 to. Unlike my phone, this device can happily chug along all day turning out a highly accurate GPS track all day and night on a single charge. Not only does this allow us to see where we have been but it helps with the the geo location of photos (more that later).

The 2200 is equipped with Bluetooth which mans that it only can you transfer the created track files back to your phone or iPad it can actually supplement the inbuilt GPS (or supply full GPS in the case of a wifi only iPad) both on and off wifi connection.

This is incredibly helpful. As I discovered while hiking through the hills of Myanmar last year - your iPhone's GPS is deactivated when the phone is set to flight mode. I found no way of turning the GPS only on without taking the phone out of flight mode and draining the battery as it constantly searches for a signal.

Another use I am keen to put the 2200 to is to assist. With geo tagging our hundreds (and thousands) of photos we take while travelling.

With some software wizardry, I can time match the time of the photo taken with an exact location. Regardless of which camera or device I used to take the photo. One of the hardest things to do after coming back from Myanmar was the reconciliation of 6000 photos with which temple or holy site the photo matched. Using freely available software I can import the track file and have the photos located by the time they were shot.

NB - all of your devices should be set to the same Timezone otherwise you will need to do some time correcting.

If you have a lot of travel across multiple countries, I would suggest using GMT or Zulu time and adding the appropriate corrections in segments. There are any number of applications, some web based, who will take the tracking file (usually gpx) and geo code your photos. Simple search geo code photos using gpx track.

I have been using the 2200 on longer road trips and found. That after 6 hours of constant tracking less than 5% battery and 10% memory used. This includes over 20000 individual tracking point

My first few weeks with the iPhone 6 Plus

My first few weeks with the iPhone 6 Plus

Screen Shot 2014-10-05 at 1.15.26 amI had been holding on to my iPhone 5, waiting eagerly for the goodies that are announced each September by the doyens of product secrecy and marketing.

Hearing the rumours of a larger iPhone really wetted my appetite. I was weighing up getting one of the larger Samsung Note 4s and immediately wipe any remnants of Samsung's gimmick filled bloatware. Thankfully the iPhone 6 plus was the answer I am looking for.

I conceit that the name of the new device is pretty crappy, most people just call it 'the big one'.

While the size is defiantly the draw point, after working with and using closely, there are other features that have really come to the forefront for me - the battery and the camera being amounts them.

The Camera

I have to admit, I am not a great photographer, Frankie is far more the photographer than I am. Most of the fantastic images we took in Mynamar were taken by Frankie.

The manual or dynamic stabilisation is comparable to my mirror-less Samsung NX1000.

The Battery

Any one who knows me knows that I am very far from my phone - to the point of even having my previous iPhone 5 in its Lifeproof case in the shower with me for music.

This often leads to having a dead phone by noon. Not with the iPhone 6 plus. With a fair among of usage, including streaming musics, push notifications, location services, background activity and constant use I easily have over 70% left at 2:30 in the afternoon. Most days achieving 11-12 hours battery life between charges.

I am now really hanging out for the life proof case for this phone

Honourable mention - the external speaker

It is not a make or break feature of a phone for me. I say phone but I am getting more and more annoyed with actually having to talk to people by telephone. I use this device like many others for the consumption of news, media, sound, podcasts along with communicating with you - the lovely people of the inter webs.

The external speaker located on the base of this phone if big, and LOUD. I can hear the sound better and clearer sitting on my sink in my bathroom, than from a bluetooth speaker in the shower.

The bending thing

I know a lot of hoohar has been made about the 'bending' of the iPhone 6 plus in people's pockets - personally I don't have those issues, mainly because I am not stupid enough to put something that cost over $1000 in my back pocket and sit on it - but hey if you did and it bent. I am sorry to hear that.